Pythoshop Tutorial
Motivation for building this package
In the digital age, images are not just pictures but a canvas of expression, a medium of communication, and a pivotal part of personal and professional branding. However, not everyone has the time or expertise to navigate complex image editing software to make their visuals stand out. Pythoshop is born from the need for a user-friendly, efficient, and versatile tool that democratizes the art of image editing.
Our high-level motivation is to empower users of all skill levels to perform essential image enhancements with ease and precision. We recognize that in a fast-paced world, quick edits should not compromise on quality. Therefore, Pythoshop aims to offer intuitive and powerful functions that streamline the editing process, turning laborious adjustments into a matter of a few simple commands.
Pythoshop is the go-to toolkit that bridges the gap between complexity and accessibility. It encapsulates a blend of simplicity and functionality, ensuring that every image you work with meets both your standards and vision, with minimal effort and time investment.
Importing Package and Image Data for Pythoshop Usage
from pythoshop.adjust_brightness import adjust_brightness
from pythoshop.resize_image import resize_image
from pythoshop.apply_filter import apply_filter
from pythoshop.transform_image import transform_image
import matplotlib.pyplot as plt
import matplotlib.image as mpimg
import numpy as np
The Pythoshop package expects the images to be read using the matplotlib library and Pythoshop functions process the images as numpy arrays. All functions directly export the images hence saving the images will be done automatically after running any image manipulation function from the package.
Basic usage
There are 4 functions available in the Pythoshop package:
adjust_brightness(image, brightness_factor, verbose): Adjusts the brightness of an image specified by the given image path. The
brightness_factorparameter allows fine-tuning the brightness level.resize_image(image, height, width, method:, verbose): This function takes an image path and adjusts the image to have the inputted dimensions using the selected method.
transform_image(image, method, direction, verbose): Transforms an image based on the specified method and direction. Options include “rotate” or “flip”, allowing users to orient images as needed.
apply_filter(image, method, degree, verbose): Applies a filter to an image specified by the given image path. Users can choose from filter methods (
red,blue,green,gray,sepia) and adjust the degree of filtering to achieve the desired visual effect.
The functions provided in this package requires an image object (represented as a Numpy array) to be supplied as input to the image parameter. Throughout this documentation, we will be utilizing the reference image.
To visualize the output image, set the verbose parameter to True. The default setting is False, returning the transformed image as a Numpy array without displaying it.
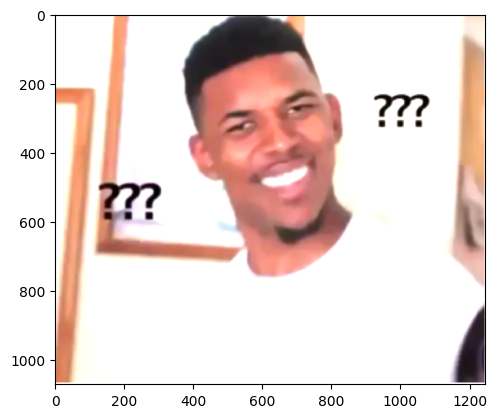
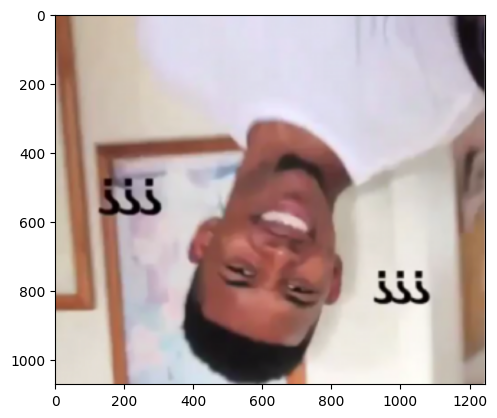
0. Reference Image
img = np.array(mpimg.imread("../tests/test_img_1.png"))
plt.imshow(img)
plt.axis('off')  # Turn off axis numbers and labels
plt.show()

1. adjust_brightness
This function changes the brightness of an input image by a specified factor. The factor can be positive to increase brightness or negative to decrease it. The brightness change is applied uniformly to all pixels of the image. The brightness_factor can be int or float, corresponding to abosulte change or percentage change
brightness_adjusted = adjust_brightness(img=img, brightness_factor=0.5, verbose=True)
<class 'function'>
2. resize_image
This function can be used to resize the image using 3 different techniques, crop the image, maintain the aspect ratio and resize the image, add borders to the image and resize the image.
We demonstrate three use cases of the resize_image function: cropping, maintaining aspect ratio, and adding borders. It also displays the original and resized images side by side for comparison.
resized_image_1 = resize_image(img, height=500, width=500, method='crop', verbose=True)
resized_image_2 = resize_image(img, height=180, width=180, method='maintain_aspect_ratio', verbose=True)
Initial image dimensions: (1070, 1246, 4)
Resized Image Dimensions:  (500, 500, 4)
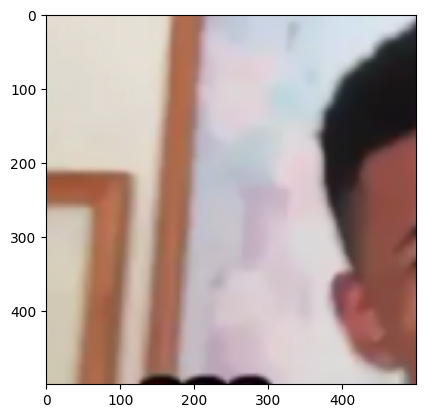
Initial image dimensions: (1070, 1246, 4)
Resized Image Dimensions:  (180, 209, 4)
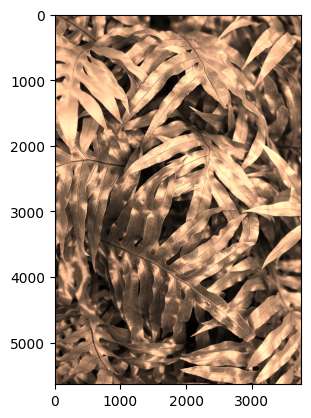
3. apply_filter
This function applies a colored filter on the original image. Users can choose from red, blue, gray, and sepia and adjust opacity from 0.5 to 1.0. Once the function runs successully, it saves the image with filter applied under the same file path with _filter_img subscript added.
applied_filter = apply_filter(img, "red", 0.8, verbose=True)

4. transform_image
This function transforms an image based on the specified method and direction. Options include “rotate” or “flip”, allowing users to orient images as needed.
After Change: Rotate
transformed_image = transform_image(img, method = "rotate", direction = "clockwise", verbose=True)
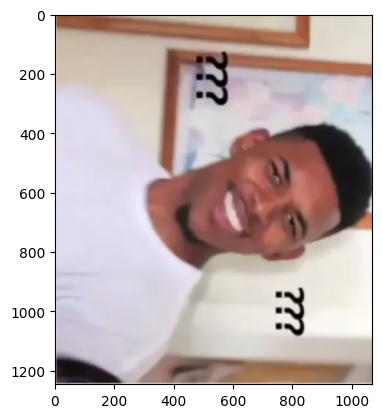
After Change: Flip
flipped_image = transform_image(img, method = "flip", direction = "horizontal", verbose=True)
Real-World Scenarios
Real-World Example: Social Media Image Enhancement
Imagine you are a social media manager responsible for creating engaging content for your brand’s social media accounts. You frequently need to adjust the brightness, apply filters, and resize images to ensure consistency and aesthetic appeal across various platforms.
Let’s say you have a collection of images captured during different events, and you want to prepare them for an upcoming Instagram campaign. Here’s how you can use Pythoshop functions:
Adjust Brightness, Apply Filters and Resize Images
import os

image_directory = 'img/data/'

# List all files in the directory
image_files = os.listdir(image_directory)
png_files = [file_name for file_name in image_files if file_name.lower().endswith(".png")]

# Saving images to be displayed later on a cell below
saved_images = []
image_list = 0

#Adjust Image Brightness
while image_list < len(png_files):
      img = np.array(plt.imread(f"{image_directory}/{png_files[image_list]}"))
      applied_image = apply_filter(img, "sepia", degree=0.7)
      adjusted_image = adjust_brightness(applied_image, brightness_factor=+20)
      resized_image = resize_image(adjusted_image, height=1080, width=1080, method='crop')
      saved_images.append(applied_image)
      image_list += 1
Here are the final images created from running the cell above.
By applying these Pythoshop functions, you can efficiently enhance and prepare your image collection for a cohesive and visually appealing Instagram campaign.